
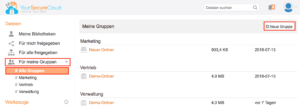
In groups, libraries can be shared to make them available to a wider audience. Users must be registered with us in the system and have their own user account (for example, with the business model). In addition, the communication can take place by means of a commentary function. Only the owner / creator of the group can add new users to a group, this right can also be transferred to other users.
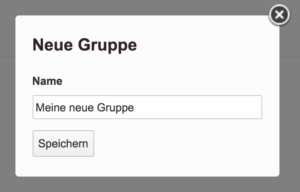
Add a new Group
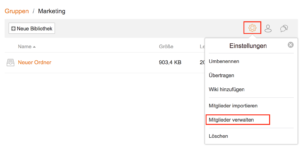
Add members to a group
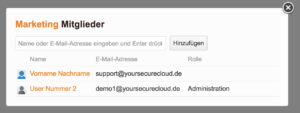
After entering the mail address (s), confirm with the Enter key. If you wish, you can also give other users the right to add more users by changing the role to Administration under Roles.
You can now share existing libraries to a group or create a new library.
Share a new library with a group
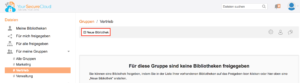
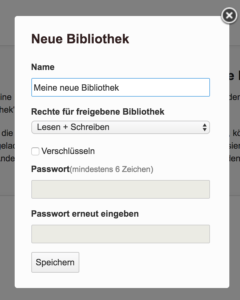
To create a new library, navigate to the group and select „New Library“:
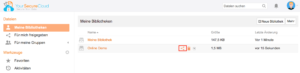
Share an existing library with a group
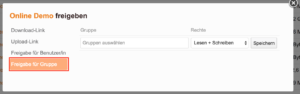
After entering the mail address (s), confirm with the Enter key. You can now choose whether the group receives read and write rights or read only rights to the library.