
Get the most out of Your Secure Cloud by installing the client on all computers and mobile devices. After installation, you can select the folders and files that will automatically be synchronized with your PC, so that all changes will automatically be transferred to all devices.
On the right side, select your operating system to directly view the appropriate guide for your OS.
How to set up the client on Windows?
To install the client on your Windows computer, follow these steps:
1. Download the installation file.
2. Open the downloaded installation file and follow the installation instructions.
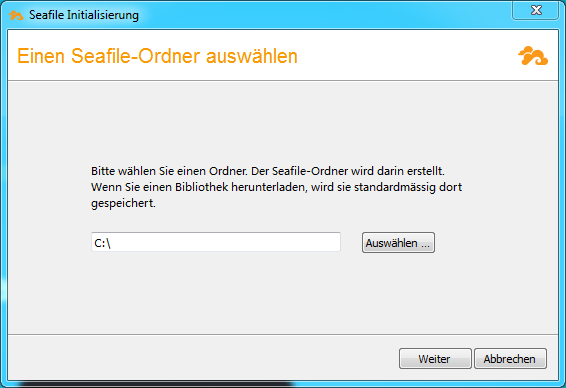
3. Once the installation is complete, you will be asked where to put the cloud folder on your PC. All files from the cloud are stored locally, unless otherwise defined later.
4. Now enter your login credentials:
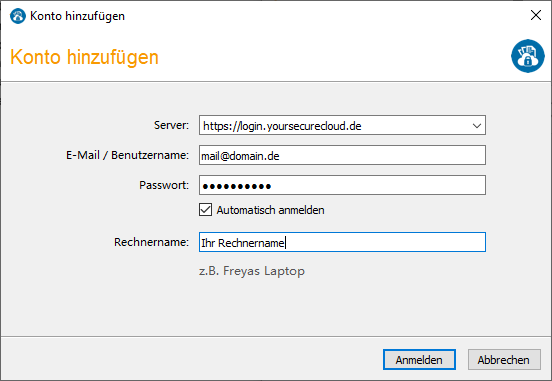
Server: https://login.yoursecurecloud.de
E-Mail: Your e-mail address, which you specified when ordering.
Password: The password that you’ve set yourself.
Computer name: Any name that later appears in the web interface.
Now click on Login.
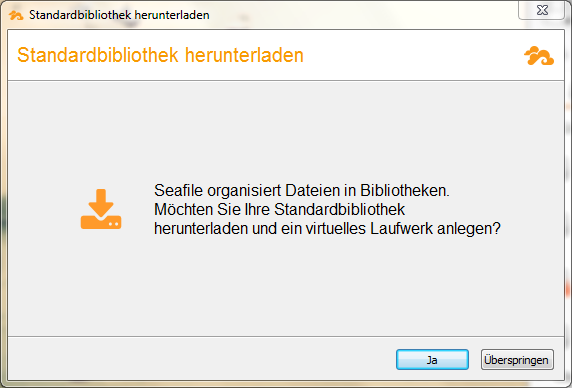
5. After a successful login, you can download your standard library („my library“). If you later want to add folders from another path, skip this step.
How to set up the client under macOS?
To install the client on your Mac, follow these steps:
1. Download the installation file.
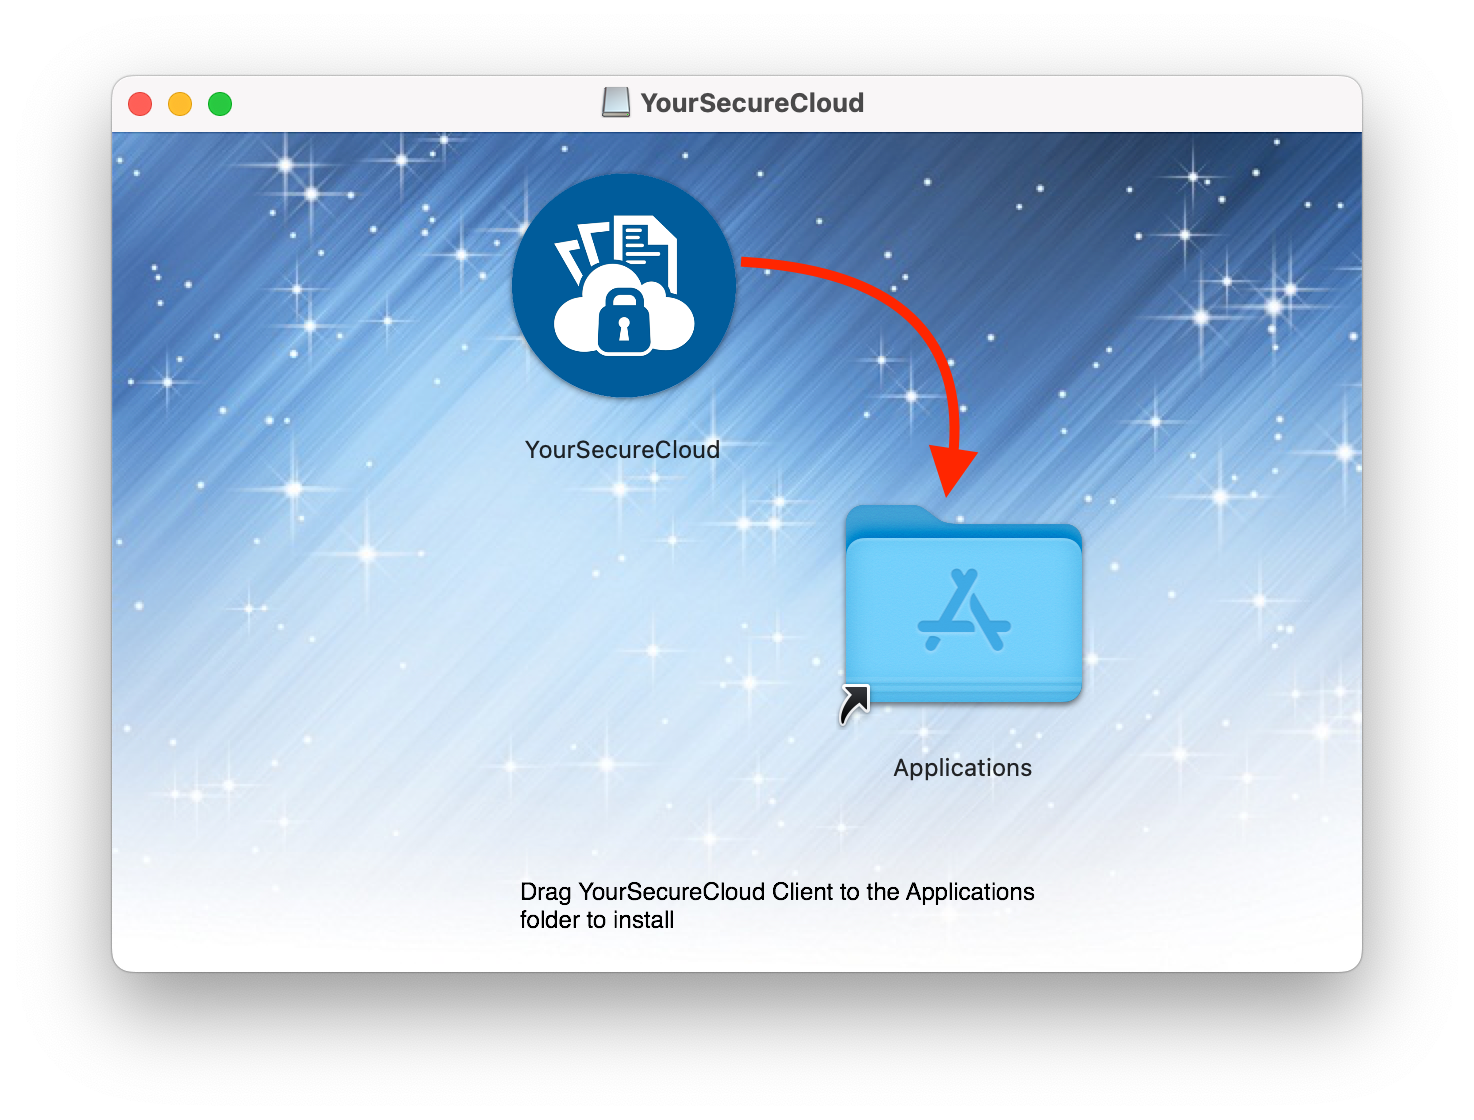
2. Open the dmg file and copy the app to the Applications folder. Simply drag our icon to the folder icon.
3. As soon as you start our software for the first time, you will be asked where to put the cloud folder on your hard disk. All files from the cloud are stored locally, unless otherwise defined later.
4. Now enter your login credentials:
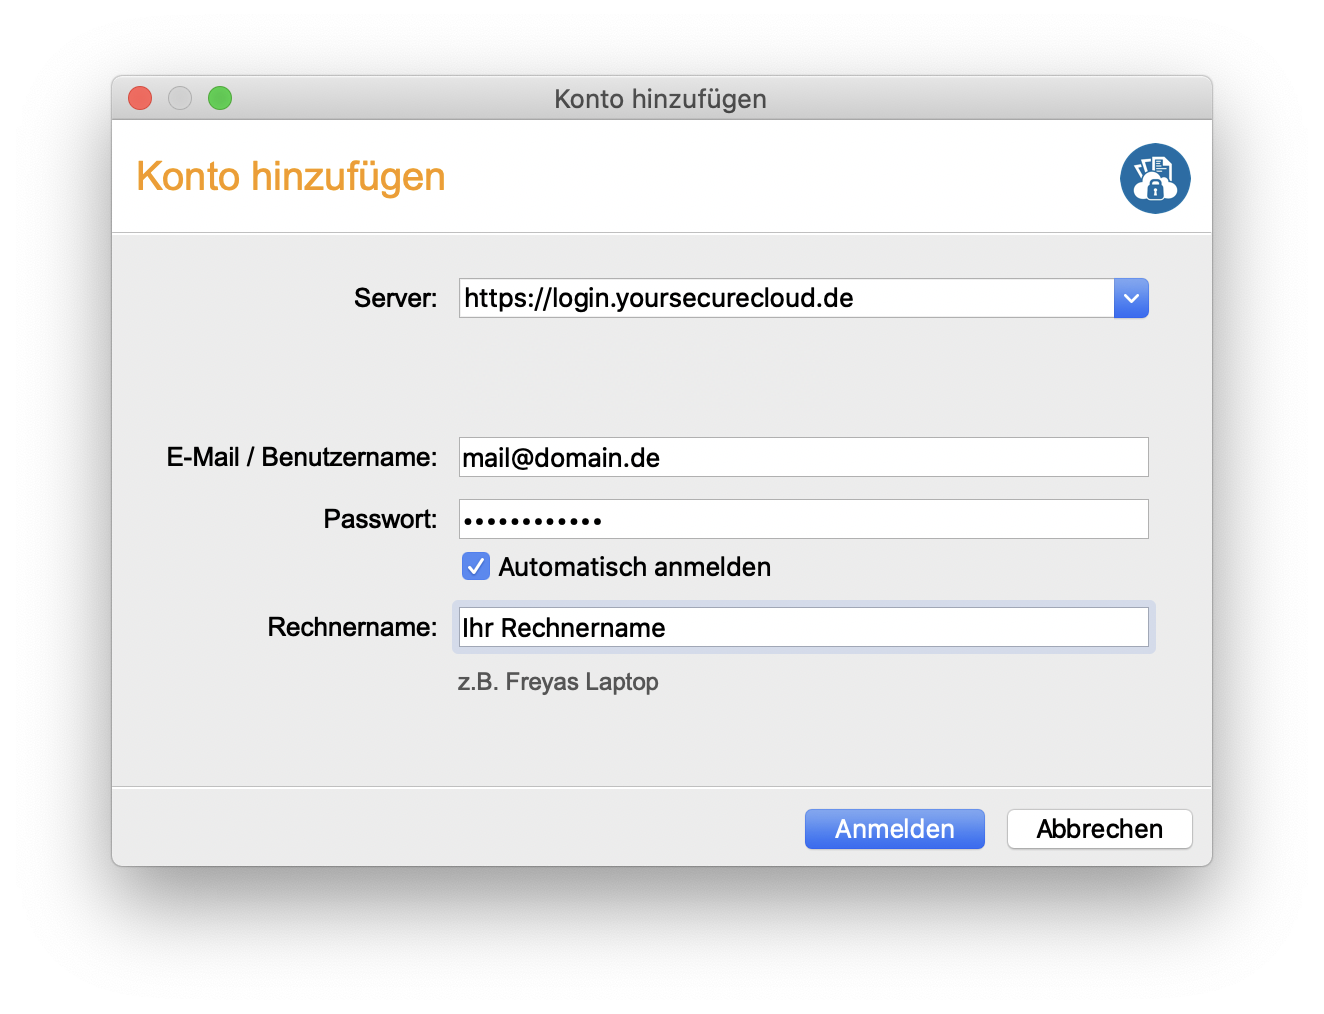
Server: https://login.yoursecurecloud.de
E-Mail: Your e-mail address, which you specified when ordering.
Password: The password that you’ve set yourself.
Computer name: Any name that later appears in the web interface.
Now click on Login.
How to set up the client on Linux?
To install the client on your Linux PC, do the following, depending on your distribution:
Debian & Ubuntu
For Debian & Ubuntu there is our own repository, which you can add with the command:
sudo wget https://linux-clients.seafile.com/seafile.asc -O /usr/share/keyrings/yoursecurecloud-sync-keyring.asc
Add the appropriate repository to your apt sources by using the line that corresponds to your Debian version:
- For Debian 10
sudo bash -c "echo 'deb [arch=amd64 signed-by=/usr/share/keyrings/yoursecurecloud-sync-keyring.asc] https://linux-clients.seafile.com/seafile-deb/buster/ stable main' > /etc/apt/sources.list.d/yoursecurecloud-sync.list"

- For Debian 11
sudo bash -c "echo 'deb [arch=amd64 signed-by=/usr/share/keyrings/yoursecurecloud-sync-keyring.asc] https://linux-clients.seafile.com/seafile-deb/bullseye/ stable main' > /etc/apt/sources.list.d/yoursecurecloud-sync.list"

- For Ubuntu 18.04
sudo bash -c "echo 'deb [arch=amd64 signed-by=/usr/share/keyrings/yoursecurecloud-sync-keyring.asc] https://linux-clients.seafile.com/seafile-deb/bionic/ stable main' > /etc/apt/sources.list.d/yoursecurecloud-sync.list"

- For Ubuntu 20.04
sudo bash -c "echo 'deb [arch=amd64 signed-by=/usr/share/keyrings/yoursecurecloud-sync-keyring.asc] https://linux-clients.seafile.com/seafile-deb/focal/ stable main' > /etc/apt/sources.list.d/yoursecurecloud-sync.list"

- For Ubuntu 22.04
sudo bash -c "echo 'deb [arch=amd64 signed-by=/usr/share/keyrings/yoursecurecloud-sync-keyring.asc] https://linux-clients.seafile.com/seafile-deb/jammy/ stable main' > /etc/apt/sources.list.d/yoursecurecloud-sync.list"
Finally, use this command to install the client:
sudo apt update

sudo apt install -y seafile-gui
Alternatively, only the terminal client (without GUI) can be installed, this works with:
sudo apt-get install seafile-cli
After installation, the client is immediately available. You can continue with step 2 (below).
CentOS 7 / RHEL
Add the repo to your system:
sudo cat > /etc/yum.repos.d/yoursecurecloud.repo <<EOF
[seafile]
name=seafile
baseurl=https://linux-clients.seafile.com/seafile-rpm/centos7
gpgcheck=0
enabled=1
EOF
You can install it with:
sudo yum install -y epel-release

sudo yum install -y seafile --enablerepo=cr
SUSE Linux / openSUSE
These packages are managed and maintained by the community, see: Official Repository
Fedora
Add the repo to your system:
sudo cat > /etc/yum.repos.d/yoursecurecloud.repo <<EOF
[seafile]
name=seafile
baseurl=https://linux-clients.seafile.com/seafile-rpm/fedora32
gpgcheck=0
enabled=1
EOF
For fedora 31, The baseurl above should be replaced with https://linux-clients.seafile.com/seafile-rpm/fedora31
You can install it with:
sudo yum install -y seafile
Arch Linux
These packages are managed and maintained by the community, see: aur.archlinux.org/packages/seafile-client
Linux command line
For further instructions on how to use the cli client, please see this page.
After installation
2. As soon as you start our software for the first time, you will be asked where to put the cloud folder on your hard disk. All files from the cloud are stored locally, unless otherwise defined later.

3. Now enter your login credentials:
Server: https://login.yoursecurecloud.de
E-Mail: Your e-mail address, which you specified when ordering.
Password: The password that you’ve set yourself.
Computer name: Any name that later appears in the web interface.
Now click on Login.