
The Drive client simulates a network drive (similar to WebDAV) so you do not have to store all the data on your PC, but can access the data when needed. This saves you space on your devices. Please note that you need to have a fast internet connection for good performance.
Installation under Windows
To install the Drive client on your Windows PC, proceed as follows:
1. Download the current client.
2. Open the downloaded installation file and follow the installation instructions.
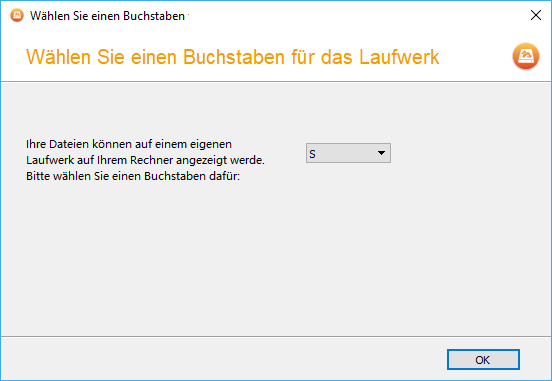
3. Once the installation is complete, you need to specify a drive letter which the network drive will be displayed later:
4. Now enter your login data:
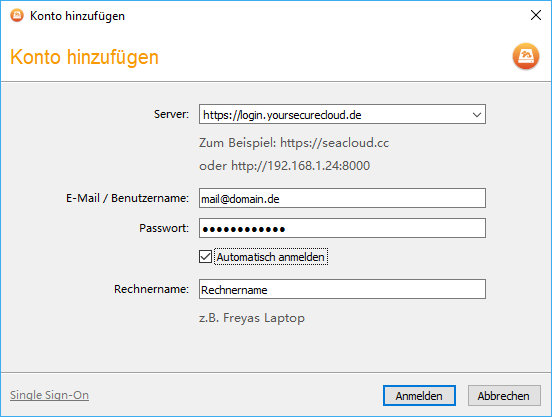
Server: https://login.yoursecurecloud.de
E-Mail: Your e-mail address, which you specified when ordering.
Password: The password that you’ve set yourself.
Computer name: Any name that later appears in the web interface.
Now click on Login.
Finally, the file list is being downloaded and the network drive is shown on your Windows Drive view.
Installation under macOS
To install the client on your Mac, please follow these steps:
1. Download the current client.
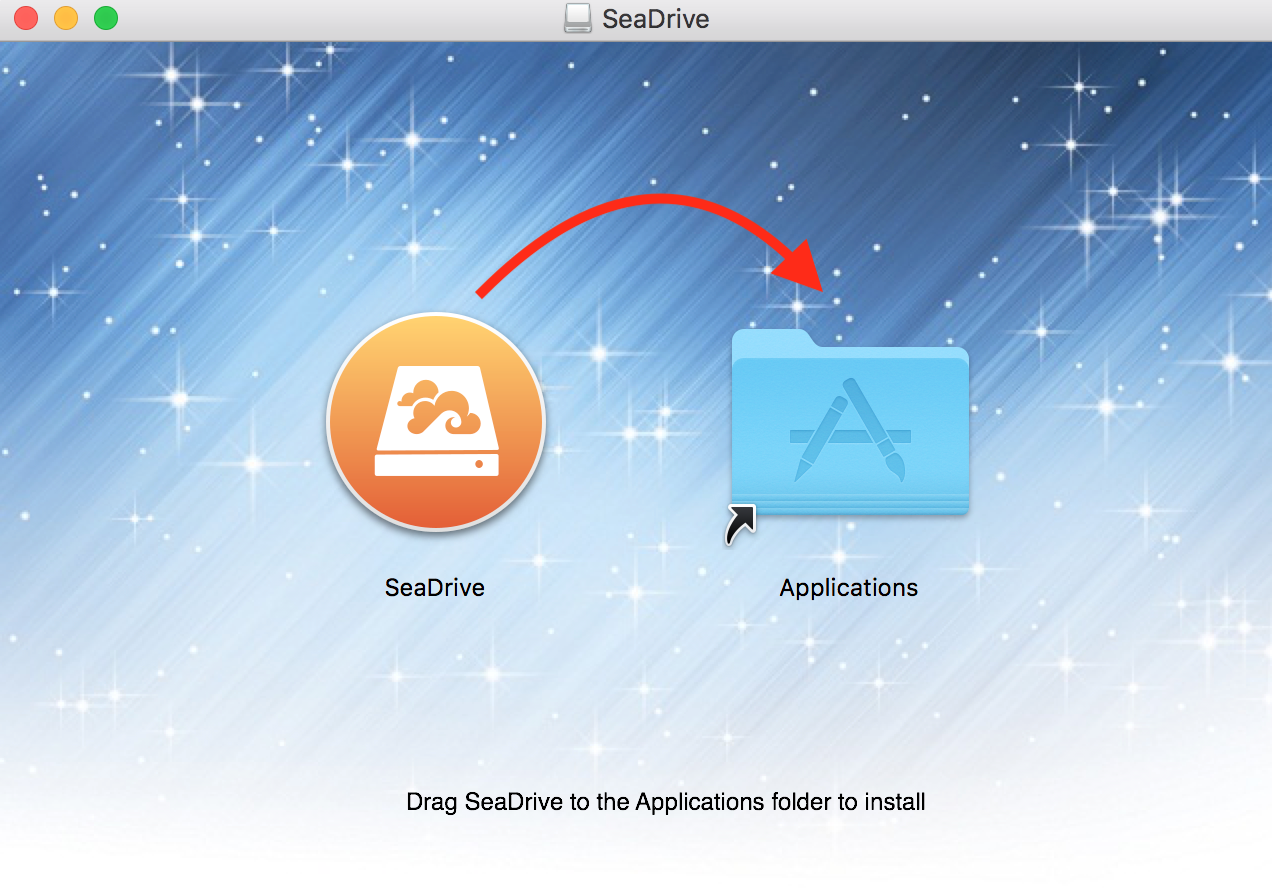
2. Open the dmg file and copy the app to your Applications folder. To do this, drag the icon to the program folder:
3. Launch the app from the Applications folder and enter your login information:
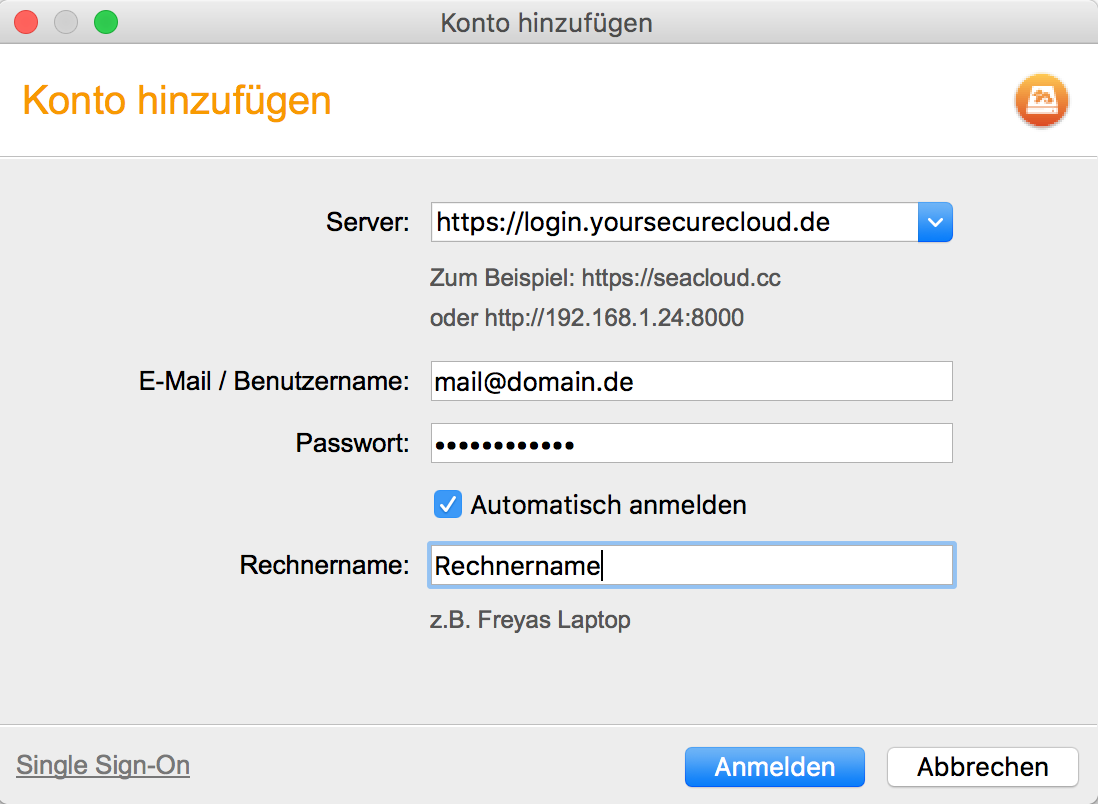
Server: https://login.yoursecurecloud.de
E-Mail: Your e-mail address, which you specified when ordering.
Password: The password that you’ve set yourself.
Computer name: Any name that later appears in the web interface.
Now click on Login.
Finally, the file list is being downloaded and the network drive is shown in the Mac Finder.
Installing on Debian / Ubuntu
To install the client, first add the signing key:
sudo wget https://linux-clients.seafile.com/seafile.asc -O /usr/share/keyrings/yoursecurecloud-drive-keyring.asc
Now add the right repo to your apt source list:
- For Debian 9
sudo bash -c "echo 'deb [arch=amd64 signed-by=/usr/share/keyrings/yoursecurecloud-drive-keyring.asc] https://linux-clients.seafile.com/seadrive-deb/stretch/ stable main' > /etc/apt/sources.list.d/yoursecurecloud-drive.list"

- For Debian 10
sudo bash -c "echo 'deb [arch=amd64 signed-by=/usr/share/keyrings/yoursecurecloud-drive-keyring.asc] https://linux-clients.seafile.com/seadrive-deb/buster/ stable main' > /etc/apt/sources.list.d/yoursecurecloud-drive.list"

- For Ubuntu 18.04
sudo bash -c "echo 'deb [arch=amd64 signed-by=/usr/share/keyrings/yoursecurecloud-drive-keyring.asc] https://linux-clients.seafile.com/seadrive-deb/bionic/ stable main' > /etc/apt/sources.list.d/yoursecurecloud-drive.list"

- For Ubuntu 20.04
sudo bash -c "echo 'deb [arch=amd64 signed-by=/usr/share/keyrings/yoursecurecloud-drive-keyring.asc] https://linux-clients.seafile.com/seadrive-deb/focal/ stable main' > /etc/apt/sources.list.d/yoursecurecloud-drive.list"
To install the Drive Client with GUI:
sudo apt update
sudo apt-get install seadrive-gui
To install the Drive Client without GUI:
sudo apt-get install seadrive-daemon
To use SeaDrive, just run „SeaDrive“ from your desktop environment, or type „seadirve-gui“ in command line. After logging into your server, the virtual drive will be mounted in ~/SeaDrive.
Installation on CentOS 7
Add the repo:
sudo cat > /etc/yum.repos.d/seadrive.repo <<EOF
[seadrive]
name=seadrive
baseurl=http://linux-clients.seafile.com/seadrive-rpm
gpgcheck=0
enabled=1
EOF
Install the Drive Client:
sudo yum install -y epel-release
sudo yum install -y seadrive --enablerepo=cr
Installation on Fedora
Add the repo:
sudo cat > /etc/yum.repos.d/seadrive.repo <<EOF
[seadrive]
name=seadrive
baseurl=https://linux-clients.seafile.com/seadrive-rpm/fedora32
gpgcheck=0
enabled=1
EOF
For fedora 31, The baseurl above should be replaced with https://linux-clients.seafile.com/seadrive-rpm/fedora31
Install the Drive Client:
sudo yum install -y seadrive
Running Drive Client with GUI
To use the Drive Client, just run „SeaDrive“ from your desktop environment, or type „seadirve-gui“ in command line. After logging into your server, the virtual drive will be mounted in ~/SeaDrive.
Running SeaDrive without GUI
In some use cases, it is useful to run SeaDrive in a server environment. To use SeaDrive without GUI, you can directly run seadrive-daemon (the background daemon) from command line.
First, you have to obtain an access token from your server.
curl -d "username=username@example.com" -d "password=123456" https://login.yoursecurecloud.de/api2/auth-token/
Then you have to prepare a config file for SeaDrive. Let’s assume that you save the config file as ~/seadrive.conf.
[account]
server = https://login.yoursecurecloud.de
username = username@example.com
token = 3131axxx3156fxxbc86aa9f12cf7xxexx64edxxb
is_pro = true

[general]
client_name = ubuntu

[cache]
size_limit = 10GB
clean_cache_interval = 10
You can only specify one account in the config file. If you need to switch accounts, you’ll have to stop SeaDrive, change config file and restart. Meaning of config options are as following:
- token: The access token you obtained above.
- is_pro: Set to true if your server is Pro edition.
- client_name: This name will be displayed in the device information on the server.
- size_limit: Size limit of local cache space.
- clean_cache_interval: Interval of cache cleaning. The unit is minute.
Then you can start seadrive:
seadrive -c ~/seadrive.conf -f -d data-directory [-l logfile] virtual-drive-dir
Tauschen Sie daten-pfad und virtueller-daten-pfad mit dem gewünschten Pfad auf Ihrem Linux-System aus.
Note that you must give -f option in the command line, to make sure seadrive runs in foregound, instead of forking as a daemon. By default, the data directory used by the SeaDrive GUI client will be ~/.seadrive/data. It’s recommended to use this path for data directory to be consistent with the GUI client. The log file path is ~/.seadrive/logs/seadrive.log.
Sometimes you’ll see the following error:
fuse: bad mount point `/home/user/SeaDrive': Transport endpoint is not connected
You can run fusermount -u /home/user/SeaDrive to fix the problem.