Now that you have installed the client on your PC, you now can select the folders and files to sync with your PC.
Add new folder for synchronization
To add a new folder to the cloud, drag and drop it into the client. Alternatively, you can use the „Choose folder“ option.
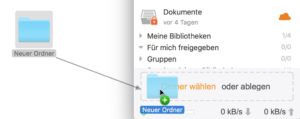
A new window will appear, where you can choose further options:
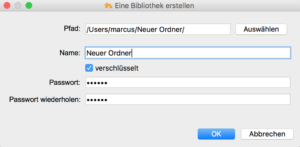
Here you can enable the end-to-end encryption by entering a password for this folder. After you click on OK, the upload starts. Depending on the speed of your Internet connection and the size of the data, the synchronization process may take some time.
Download and synchronize an existing folder from the cloud to the computer
To sync an already uploaded folder from the cloud to a (second) computer, proceed as follows:
Right-click over the folder name in the list, that you want to synchronize with your computer. Here you select the option „Download and sync“:
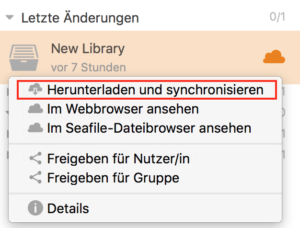
In the next window, you now have the option of individually setting the storage location on your PC of the folder:
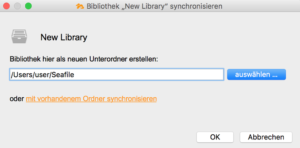
If you sync an encrypted library, you will also need to enter the password here.
Match an existing local folder with an existing folder from the cloud
If you have already uploaded a folder to your computer and it won’t sync anymore, you can easily restore the sync state without having to upload everything again. With this option, you can also upload files from one computer and then later synchronize them with the cloud on a second computer that already has the same files locally on the hard disk. This saves you a lot of time and traffic.
Right-click on the folder name that is also available locally on your computer and select the option „Download and Synchronize“:

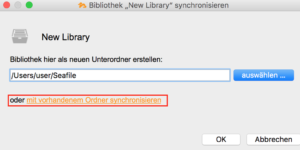
You must now select the option „Synchronize with existing folder“:
Finally, select the existing folder path on your hard disk and click OK.
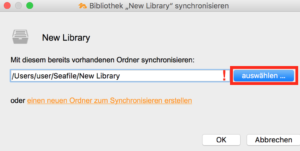
The system now syncs the content of your computer and our cloud. For different files, so-called conflict files are created. Learn more about conflict files in this article.

